Saturday, May 29, 2010

This is totally fitting...

I have been busy all week getting ready for a massive community wide garage sale, and since we really had to clean up the garage and put all my hubby's tools away I think this card is quite fitting today. I bought Totally Tool with my hubby in mind since he loves to go wood working projects and has a ton of tools. I try to make him cards with this set often, and I love the message on this particular stamp....love beyond measure, it's quite cute, but is also how I feel, so it works out well.


Stamps: Totally Tool
Inks: Real Red, Pacific Point, Basic Gray,
Paper: Whisper White, Basic Gray, Pacific Point, Nouveau Chic
Misc: Star Designer Brads, Sponge Daubers, Stampin Dimensionals.

I wanted this card to have a bit more rugged and manly feel, so I crumpled some of the Nouveau Chic DSP and then added some dark gray with the sponge daubers.


Saturday, May 22, 2010

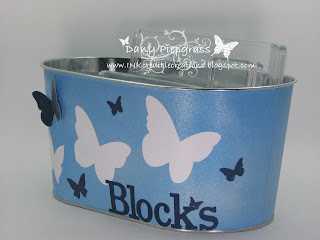
Adding more butterflies....

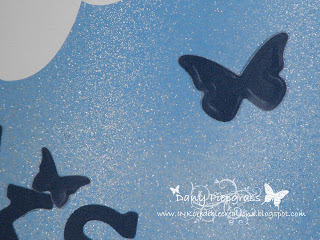
I really like butterflies, and I decided that the 3 that I used on my clear block tin from the Decor Elements Flutter set, just were not enough. I had some Night of Navy Decor Elements sheets and I decided to run them through the Big Shot and I used the Beautiful Wings die as well as the Timeless Type Alphabet Junior Sizzlits and this is what I ended up with.


I really love what it looks like now, and cutting the sheets of Decor Elements with the dies was super easy! I think I am going to have to do some more for elsewhere in the house. My son has already asked me to add some to the old laptop that he gets to play with, so now I am trying to figure out what to put on there for him.


Friday, May 21, 2010

New Background

I want to thank Michelle at Shabby Creations for helping me to actually figure out how to upload my new background and sidebar buttons to my blog. I am still in the process of changing my text colors and what not so it appears better so you can read it better. So please bear with me over the next day as it all changes constantly. I'd love to hear what you think of the changes I made.


Thursday, May 20, 2010

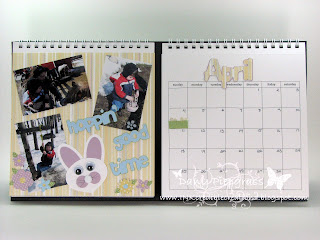
more calendar pages

I *think* I am done testing my new blog background. I am hoping to get some more time tonight to actually transfer it to this blog. I created it all in MDS, and that part was super easy!! I even made matching sidebar buttons and my new watermark as well. The only part I really had issues with was the uploading to the internet and to blogger. I am not very computer smart and while my hubby is, I wanted to figure it out as much on my own as I could. I did get some help from Michelle at Shabby Creations on the sizing of my template and where to update the code. I also FINALLY figured out why I was having such issues uploading my background.... apparently my setting on my photobucket account were wrong... it was resizing my files automatically, which made them too small.

Since I still do not have anything new to show you, here are some more calendar pages.


Until next time, Happy Scrappin'

Monday, May 17, 2010

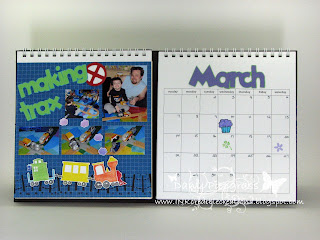
Days to remember

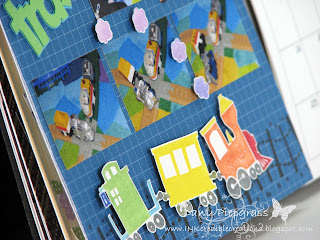
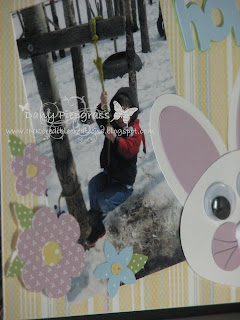
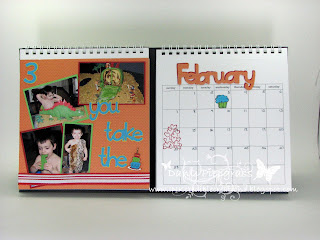
I made this desk top calendar for my hubby for Christmas. I was planning on posting this much earlier, but things have a way of getting away from me some days. I am planning on posting all the months on here, to give you ideas, in case you want to make one yourself.... never to early to get started on Christmas gifts.

Stamps: Teeny Tiny Wishes
Ink: Taken with Teal
Paper: Holiday Lounge DSP, Chocolate Chip, Taken with Teal, Sahara Sand, Whisper White, Basic Black, Brushed Silver
Misc: Dazzlin' Diamonds, Cricut
Stamps: Loads of Love, Birthday Bliss
Inks: Real Red, Tempting Turquoise, Green Galore, Only Orange
Paper: SAB DSP, Green Galore, Real Red, YoYo Yellow, Tempting Turquoise
Misc: Stampin' Dimensionals, 1/2" Real Red Striped Ribbon

I hope you all had a fantastic weekend, and are enjoying the week so far. I spent a fair amount of time playing around with MDS and photoshop trying to make a new blog background. I love what I have created, but so far my dimensions are off, and I only have part of the background showing. Tomorrow I will be getting some help from Michelle over at Shabby Creations and I hope to be showing off my cool new digs very soon.

Until next time, Happy Scrappin'

Friday, May 14, 2010

better late than never

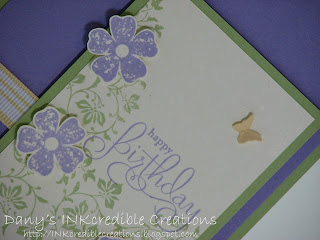
I made this card a while back for a PPA weekly color challenge, but didn't get it made in time for the submission deadline. I ended up going out of town right after that and never got around to posting it. Turns out that was a good thing, otherwise I would not have anything to show you today.

I am currently working on giving my blog a face-lift. Sadly I know nothing about how to do this, so it is taking me forever. It took almost no time at all to design what I wanted in MDS, but trying to get it to appear properly on my test blog is a completely different thing all together. Please bare with me if I don't get a lot of posting done over the next couple days.


Stamps: Vintage Vogue, Well Scripted
Inks: Certainly Celery, Lavender Lace
Paper: Very Vanilla, Certainly Celery, Lavender Lace, Barely Banana
Misc: So Saffron Striped Ribbon, Beautiful Wings Embosslits Die, Stampin' Dimensionals

If any of you have any experience making your own blog designs, especially with using sidebar buttons and links and such and would be willing to help, please email me. Thanks

Until next time, Happy Scrappin'

Wednesday, May 12, 2010

tin/aluminuim anniversary

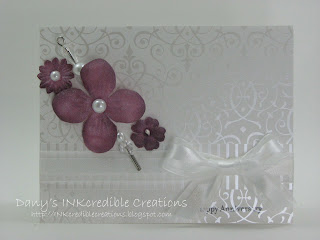
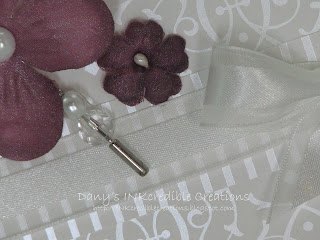
While the traditional gifts for a 10th anniversary are not all that 'pretty' at least when you are trying to make a card using those items.... the modern gift for a 10th anniversary is diamonds. I have always thought that the Bride DSP looks shimmery like a diamond, so I choose to use this as my background paper. I also love the jewel look of the pearls and crystals in the pretties kit, and diamonds are jewels, so score again! My brother and sister in law just celebrated their 10th anniversary, so I wanted to make a very special card for them, since they are such special people. I also wanted to wait until after I had given it to them to post in on here.


Stamps: Teeny Tiny Wishes
Inks: Rich Razzleberry, Basic Black
Paper: Bride DSP
Misc: Pretties Kit, Aqua Pen, Organza Ribbon, Reinkers

To color the flowers from the pretties kit, I used an aqua pen and Rich Razzleberry reinker. I picked up color from the reinker with my aqua pen and then colored onto the flower. The more you squeeze the pen the lighter the color will be, the drier the pen, the darker the color will be. You can also shade using this method, you just need to wait a little bit in between coloring to let the fabric dry a bit.

I am off to my running club. I did survive the 5K on Sunday and have rested up so I am ready for some more punishment.

Until next time, Happy Scrappin'

Monday, May 10, 2010

Video Tutorial Tips

I have had a lot of the same questions asked, so I am going to post the answers here in hopes it helps others out.

Music - there are 3 options first is to press the pause button in the music widget in the left sidebar, second is to click the tutorials tab at the top of the page, that will take you too another page that has no music. Third is to double click on te video itself, this will take you to my youtube page where you can view the video on a larger scale anyway.

Inkjet Vinyl - It is Papilio clear inkjet vinyl and I got it from here http://www.texascraft.com/hps/home.php?cat=253

Binder - 12x12 Crop in Style PBS I got it from scrapbook.com


If there are any other questions please let me know and I will post the answers here.

Saturday, May 8, 2010

How to print onto cling vinyl tutorial

I now have the last video uploaded, and this one is how to print onto the cling vinyl. This completes the set of 3 for converting your wood mount stamps to cling mount.


Please let me know if you have any questions. For those of you having trouble with hearing the video over the music, there are a few options, first you can click the pause button on the music widget on the left sidebar. Second, you can click the tutorials link at the top and that will take you to another page that has no music. Third you can double click on the video and that will take you to the youtube page.

For those of you that are getting tired of all the videos, I will have some new cards and projects posted next week..... that is if I am still alive after the 5K race tomorrow. I know that might not sound like a lot to most of you, but for some one like me, who would rather drive to my grams place 1K away than walk it.... it is a LOT!

Until next time, Happy Scrappin'

Friday, May 7, 2010

Stamp Storage Video Tutorial

I finally managed to get a quick video done of my stamp storage for you. I had to wait until the kid was sleeping, since he was very loud today.

On the off chance that any of you know what you are doing with Youtube, I have a small issue with my channel. Apparently it is only showing 3 of my uploads and not all 4. When I search for the specific one, it will then come up, but it doesn't automatically come up when you view my channel. If you can help me out, please email me.

I hope you get some ideas from this.


acetate used: Clear Craft Plastic - office suppy store
12x12 page protectors used: 4x6 photo We R Memory Keepers - online store
12x12 zippered binder used: Crop in Style PSB - online store

If you have anymore questions please email me and i'll help you out.

Until next time, Happy Scrappin'

Wednesday, May 5, 2010

A Little Challenge...

I have decided to issue a challenge to all of you today. I have to clean my house from top to bottom today, since we are having an inspection come through tomorrow. I am also trying to tape another 2 videos, and get some cards made. ALL TODAY!.... ha... yah right....

So... my challenge for you all is to do a little cleaning that wasn't already on your to do list. After getting 3 rooms done, it really starts to feel good. Since the weather outside (snow!!!) was trying it's best to put me in the dumps, I am loving the boost to my mood that seeing all these clean rooms gives me. And I'll bet my hubby will love it too. The hard part to all of this is to try and have it still TIDY tomorrow, since my wonderful child and dog are doing their best to un-tidy as soon as I am done.

I am off to go clean some more rooms. I think I will be leaving the Stampin' Pad for last.... since I will probably get really distracted and not want to start cleaning again.

If you decide to take me up on my cleaning challenge, please leave a comment here and let us know what you did.

Until next time, Happy Scrappin' Cleaning

Another video tutorial.

I know a few people have been waiting for this tutorial on how to make cling mount stamps out of your current wood mount stamps. I must say I LOVE how well they work. It really takes no time at all to do, and then all your stamps are the same system. If you have any questions please email me or leave me a comment.

I should also mention, I made this video while my son was supposed to be playing nicely.... I promise no child or dog was hurt during the making of this video.... it just sounds like the dog was being mauled to death by a 4 year old boy :-)


Stamps: Very Thankful
Misc: Inkjet Vinyl

I still have a few sheets of these left over, so if you are interested in giving this a go, let me know.

Until next time, Happy Scrappin'

Sunday, May 2, 2010

vintage flowers

As most of you know I am really not a fan of pink anything, however I always try to get over that when I am making cards for others. I made this for my gram's 88th birthday and since she loves pink, I used only pinks and neutrals for the main colors. I just love the new set Vintage Vogue, and I really like to distress the cards I make with it. I am also working on a scrapbook page using this set, and of course it is a heritage page.

It is hard to see on these 2 pictures, but I actually embossed the pink cardstock first using the elegant bouquet folder, then I misted the cardstock with water and crumpled it up. When I un-crumpled it and left it to dry it looks like really old paper.
I also sponged a little chocolate chip ink on the edges of all the flowers to soften them up a little, and make them look older as well. I did the same with the edges of the very vanilla cardstock. Stamps: Vintage Vogue
Inks: Pretty in Pink, Regal Rose, Garden Green, Chocolate Chip
Papers: Very Vanilla, Chocolate Chip, Pretty in Pink
Misc: Corduroy Buttons, Distresser (from the cutter kit), Crop-A-Dile (to make the little flower centers), 5/8" Chocolate Chip Grosgrain Ribbon

Until next time, Happy Scrappin'