I am finally up and around a little bit tonight. I actually made it all the way out to my Stampin' Pad where my main computer is!!! That is a major accomplishment for me after the week I have had. I have spent the majority of my time in bed, thinking I was dying. I ended up at the hospital 3 times as well. I am slowly getting better, I am no longer in ridiculous pain when I cough, only kind of stabbing pain while I cough instead of it lingering. I have had Pneumonia before, probably 10 years ago, and while it was bad, it was no where near this bad. I think I would rather have another natural childbirth than go through this again.
I want to thank those of you who have commented and emailed me get well wished. I also want to very publicly thank my wonderful sister in law Catherine. She is so amazing. She not only brought me and my son lunch yesterday, she took him back to her place for a play date and then when my hubby went and picked him up she gave us a huge casserole dish with my favorite meal in it!!! I was getting my appetite back yesterday and ate a little, but today I was starving and that Spanish Rice has never tasted so good.
Disgusting warning here, if you are squeamish don't read further.
I also need to thank my hubby. He has taken such good care of me, even when I was coughing up blood all over him and the pillows. The house might be a little dirty-er than before I got sick, but all my laundry has been done and meals and meals of soup, jello and pudding. I have looked awful and I am sure smelt awful too, but he has been right beside me trying his best to make me feel better.
I am sure hoping I will be back making cards by the end of the weekend. I have felt so crappy that I did not even make good use of My Digital Studio to get some scrapping in.
Thanks for sticking with me and understanding and sending well wishes. Until next time, Happy Scrappin'
Friday, February 26, 2010
Wednesday, February 24, 2010
a little update
My wife has asked that I post a quick update on here for you all. She is quite sick with pneumonia and has been in bed for the last several days. When she is feeling better she will get back to creating and posting for you.
Saturday, February 20, 2010
Very Thankful
I love taking stamps that are meant for one sentiment and using them for another. I saw a really cute card on Andrea Walford's Blog and really wanted to re-create it. The only turtle stamp I have is the one from the Ronald McDonald Charities set Very Thankful, so I used that one. I created a stencil or mask of sorts out of scrap paper to help me make my cloudy background. I used Tempting Turquoise and Bashful Blue for the sky, that way you get a bit more definition and it looks nicer (and in my opinion more real).
Glitter and the Sweet Pea Felts are a great way to add a little something that makes the card (or scrapbook page) a whole lot better.


 Stamps: Loads of Love, Very Thankful
Ink: Rich Razzleberry, Chocolate Chip, Tempting Turquoise and Bashful Blue Classic Inks, Aqua Painters and Reinkers - Rich Razzleberry, So Saffron, Old Olive, Chocolate Chip
Paper: Rich Razzleberry, Whisper White, Soft Suede, Old Olive
Misc: Rich Razzleberry Polka Dot Ribbon, Sweet Pea Stitched Felts, Fine Supernova Glitter (Olive), Sponges, Paper Snips (to make the grass fringe), Textured Impressions Perfect Polka Dots Embossing Folder
I hope you are not too sick of Valentines Day cards yet.
Until next time, Happy Scrappin'
Friday, February 19, 2010
Pretty Bows
I like to think that I can tie a pretty bow. I don't do it very often, but for special cards, like the one I actually gave my hubby on Valentines Day I will do them. They don't take that much more effort, but for some reason I save them for special cards. I also love using the Bride Specialty paper and changing the color of it. It is so easy to do, the easiest way is to use a brayer to roll the color over the paper, and then take a Kleenex or paper towel to rub it off leaving the white swirl pattern. You can also take the ink pad and just rub it over the paper and then take the Kleenex and then wipe off the excess again, but sometimes you do not get as even a job as if you used a brayer.


 Stamps: Teen Tiny Wishes
Ink: Bermuda Bay
Paper: Welcome Neighbor DSP (SAB), Bermuda Bay, Whisper White, Basic Black Cardstock
Misc: Crystal Effects, Pinking Hearts Border Punch, Half Back Pearls (Pretties Kit), 5/8" Basic Black Satin Ribbon, Textured Impressions Perfect Polka Dots Embossing Folder, Word Window Punch, Modern Label Punch
Until next time, Happy Scrappin'
Thursday, February 18, 2010
Holiday Best
Sometimes Hostess sets don't look all that appealing at first, but then you want to make a card and they are the perfect set for that card. This is one of those times. I chose this set only for the Christmas stamp included in it, and did not think I would ever use the other stamps since I do not make thanksgiving cards and my Halloween cards are for kids, not adults and I like them to be funny or scary, not elegant. This Valentines stamp was perfect for a card I wanted to make for my husband.
I used the Nouveau Chic DSP and chalked a little bit more color onto it. This particular piece has a bit of Apricot Appeal on it, but I wanted to add some more Sage Shadow in without it being overpowering, so I used the Stampin' Pastels. They are perfect for adding just a little bot of color since you can really control how much goes on.


 Stamps: Holiday Best
Ink: Basic Gray
Paper: Sage Shadow, Basic Gray, Whisper White Cardstocks, Nouveau Chic DSP
Misc: Sponge Daubers, 3/4" Circle Punch, 5/8" Basic Gray Satin Ribbon, Stampin' Pastels, Stampin' Dimensionals, Texturz Plates Backgrounds 1
I love the subtle added dimension that the Texturz Plates add to a project. It is not as crisp or defined as a typical embossing folder, but it still adds a little bit of interest. You can make it pop out more by adding a cardstock shim or two to get more pressure and get more definition.
Also if you are worried about your Satin ribbon fraying an easy way to seal the cut ends is to take your heat gun for embossing and to just hold it near ish the cut ends and it will melt the ends. You don't want to get too close, but you will see the change in the ribbon when you do this. I did it on this ribbon to show you what it looks like. You can barely notice that I did it, but they will not fray anymore.
To get the large scallop border I took 3/4" circles from the punch and cut them in half and placed them under the layer of sage shadow cardstock.
Until next time, Happy Scrappin'
a personal note
I wanted to give you all a heads up. I might not be posting too much after my pre-scheduled posts appear for a couple days or so. I spent the better part of yesterday and all night at the Children's Hospital with my son. It looks like he is getting better, and they had no beds for him so they sent us home, but we will most likely end up back there again before the day is over. Obviously I won't be able to create anything or post while I am there, but as soon as my little monkey is feeling better I will be back.
Until next time, Happy Scrappin'
Until next time, Happy Scrappin'
Wednesday, February 17, 2010
More Valentines
I hope you are not too sick of Valentines cards cause I still have a few to show you. I have not been posting too much due to stuff in my personal life, so I am taking time today to set up a week's worth of posts so you will have something to look at each day.
My son really wanted to use a few sets for Valentines day and he insisted I use this set, so I went to SCS and found a card I wanted to case. It is done by Cindy Major, another very talented Canadian blogger. I changed it a bit, to better suit my supplies and my hubby. I used my Movers and Shapers Bigz XL die. It makes making unique cards super easy.


 Stamps: Lots of Bots
Ink: Versa Mark, Basic Gray Classic Refill, Bashful Blue Classic Refill, Almost Amethyst Classic Refill
Paper: Basic Black Cardstock, Night and Day DSP
Misc: Silver Embossing Powder, Aqua Pen, Embossing Buddy, Movers and Shapers Bigz XL Die, 5/8" Basic Black Grosgrain Ribbon, Nuts from a spare light switch
Until next time, Happy Scrappin'
Saturday, February 13, 2010
Be mine
I love black and white and variations of them, and think they always make for wonderful masculine cards. This is from the Nouveau Chic DSP and I love the WHOLE pack. Normally I really like most of the sides, but dislike a few sides, so I end up with 2 of the other side, but not this time! I had used quite a bit of the right side of this paper where it is only circles, but didn't know what I would do with the design on this side. It works perfect for this card, I love it when things work out well by accident.

 It is fairly hard to see here, but there is Dazzlin Diamonds Glitter on the left side of the design, it looks great in real life, but did not photograph well at all. I hope you can see it.

Stamps: Holiday Best (level 1 hostess)
Ink: Purely Pomegranate (retired in color) Basic Gray (Stampin' Pastels), Platinum Shimmer Paint
Paper: Basic Gray Cardstock, Brushed Silver Cardstock, Nouveau Chic DSP
Misc: 5/8" Basic Gray Satin Ribbon, Dazzlin Diamonds, Stampin Dimensionals
I hope you all had a great week and are having an even better weekend.
Until next time, Happy Scrappin'

 It is fairly hard to see here, but there is Dazzlin Diamonds Glitter on the left side of the design, it looks great in real life, but did not photograph well at all. I hope you can see it.
Stamps: Holiday Best (level 1 hostess)
Ink: Purely Pomegranate (retired in color) Basic Gray (Stampin' Pastels), Platinum Shimmer Paint
Paper: Basic Gray Cardstock, Brushed Silver Cardstock, Nouveau Chic DSP
Misc: 5/8" Basic Gray Satin Ribbon, Dazzlin Diamonds, Stampin Dimensionals
I hope you all had a great week and are having an even better weekend.
Until next time, Happy Scrappin'
Thursday, February 11, 2010
Birthday cards for kids, by kids
My nieces were over the other day and they both love to play with my stamping stuff and they asked if they could make cards for another niece's birthday. I never pass up a chance to play with them and teach them new things, I mean why not get the next generation hooked early right? The first card was done by Alex and the second card was done by Sam. I did help them a bit but not much. They looked through my samples and found cards they wanted to re-create. Alex used different paper, but kept the design quite similar and Sam kept the card design, but used different stamps and colors too.

 Stamps: Bugs & Kisses, Pun Fun
Ink: Real Red, Only Orange, Basic Black, Tempting Turquoise, Green Galore, Brilliant Blue
Paper: Tempting Turquoise, Whisper White, Green Galore, Brilliant Blue, Gable Green and some patterned paper from my stash not sure what or who
Misc: Pumpkin Pie Striped Ribbon, Scallop Trim Border Punch, Star Punch, Stampin Dimensionals
It's it fun to let kids create and see what they come up with?
Until next time, Happy Scrappin'
Wednesday, February 10, 2010
I Choo-choo choose you....
Do you remember that Simpson's episode? The one where Lisa feels bad for Ralph since no one gave him a Valentine, so she gave him a train one that read I Choo-choo Choose You and then Ralph started to stalk her and all. I love that episode and every year I make my hubby a Valentines card that I can write that in. It's another little joke of ours, cause way back when he thought I was stalking him, when in actuality I was friends with friends of his and was out with them a fair bit.
This is such a fun stamp set and I love doing all sorts of cards with it. My son plays with this set at least once a week, and watching him play with it has inspired a few of my cards. Every time I am scrapping he has to as well. He has a few cheapie stamps for his box of goodies, but he loves to use Stampin Up, so this set and the Prehistoric Pals he can use whenever too. It's quite funny to see a 4 year old boy turn his nose up at 'regular' paper and supplies. He already is a loyal Stampin Up customer, I think mostly cause of the "Yay Man" and the boxes of goodies that "magically" appear, instead of his box that is leftovers from Mum.
Enough of my ramblings, here is the card.


 Stamps: Choo-choo, Best Wishes and More, I {love} love jumbo wheel
Inks: Perfect Plum & Pacific Point (retired)
Papers: Bashful Blue, Whisper White, Perfect Plum DSP & Pacific Point (retired)
Misc: Modern Label Punch & Movers and Shapers Die, Dazzlin' Diamonds Glitter, Bashful Blue 1/2" Striped Ribbon, Stampin' Dimensionals
To get the layered effect for the Modern Label Punch I first used the punch on whisper white cardstock and then I used a piece of Pacific Point with the Modern Label Movers & Shapers Bigz XL die for the Big Shot. I love that the pieces for this die are just a little bit bigger than the punches so you can layer them if you want. I will have a card up tomorrow that uses the curly label die for this as well. It is a really neat effect when you cut it out from the card front.
For the smoke stack of hearts I inked up specific hearts from the I {love} love jumbo wheel in Perfect Plum and then cut them out and used Dimensionals to adhere them. After they were on the card I added the Dazzlin' Diamonds, I figured it would be too hard to try to do that one by one.
Until next time, Happy Scrappin'
Tuesday, February 9, 2010
With all my Heart
I spent the afternoon over at my grams place with my son making Valentines for the both of them. She wanted to give him a valentine, but didn't want to have to buy a whole pack just for one, and we needed a few for his friends and cousins. I pre-cut the paper and stamped the images and then let them at it. Considering both their ages and ability levels they did fantastic! I will get pics of those up in a day or two.
Here is another card I made for John for his Valentines gifts, yes gifts, plural. I decided to make him 14 cards and 1 project for Valentines Day, since it is the anniversary of our first date, years ago. I cased this wonderful card from Mary Fish, she is so amazing and always does such beautiful work. I had to improvise a little bit since I did not have the patterned paper she used, so I made my own red and green 'DSP' with a stamp from the stamps Loads of Love and Sanded and white craft ink.


 Stamps: With all my heart
Ink: Chocolate Chip Classic Ink, Whisper White Craft Ink
Paper: Welcome Neighbor DSP, Green Galore, Real Red, Bermuda Bay, Sahara Sand Cardstock
Misc: Real Red Corduroy Buttons, Pinking Hearts Border Punch, Linen Thread, Mini Library Clip, Full Heart Punch, Heart to Heart Punch, Bermuda Bay Polka Dot Ribbon, Stampin Dimensionals
Until next time, Happy Scrappin'
I've been AWOL.....
Sorry about that. Things got quite hectic here getting ready for my sons birthday, and re-doing several rooms in the house as well. I have also been very busy making a birthday banner for his Transformer themed party, so I figured a break with the Valentines cards would probably be nice for all of you.
I made his party banner from the Bigz XL Pennant Die. It was sooooo easy to make with this. It cuts the pennant as well as the small scallop circles that are hanging, and all the score lines are pre-done, so you can't mess it up!
I let my son pick all the colors, and he picked 'Optimus Prime" Red and Blue and 'BumbleBee' Yellow and Gray for the main pennants as well as 'Skids' Green and 'Jazz' Light Blue for the letters/


The Transformer paper is wrapping paper we found at a Wal-Mart in Az after Christmas as well as a free image of Prime I found online and printed at home. They were cut out using the Scallop Circle #2 Bigz Die.
Until next time, Happy Scrappin'
Friday, February 5, 2010
New Digital Downloads
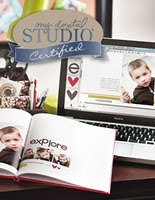
Get ready to accessorize your digital projects with two new digital downloads for My Digital Studio! The Sending Love epoxy brads and the Corduroy Buttons digital downloads are perfect for adding depth and dimension to your digital projects and will coordinate perfectly with other exclusive Stampin′ Up! papers, designs, and colors.

How great are these??? I love them and know I'll be adding them to my next order, I can never get enough of the corduroy buttons and now I will have them for forever.... I love that I'll never run out of them, that is one of the best things about digital embellishments.
Until next time, Happy Scrappin'


| Item Number | Name | Price |
| 120170 | Corduroy Buttons - Digital Download | $5.95 |
| 120169 | Sending Love Epoxy Brads - Digital Download | $2.95 |
How great are these??? I love them and know I'll be adding them to my next order, I can never get enough of the corduroy buttons and now I will have them for forever.... I love that I'll never run out of them, that is one of the best things about digital embellishments.
Until next time, Happy Scrappin'
Wednesday, February 3, 2010
Happy day....
I finally have internet again!!!! It went out on the 31st late at night and then was a little intermittent yesterday, not long enough to do anything, even check mail! Hubby has been working on it all day and night, even getting a new router and modem and FINALLY it works!!! I am sooo happy, I am doing the happy dance. I HATE being cut off from the world around me, and feeling like I don't have a clue what is happening. Sooooo many things happened too, the Flames completed a trade I had heard rumors about, played a game and lost, and traded some more guys. I also got tons of mail, and apparently lots of stuff happened to my extended family on monday too, so had to get back in the loop.
I did have a bit of fun earlier today when the Yay Man came and dropped off my goodies! I opened up the boxes and sorted everything, but unfortunately I didn't even get to play with my goodies. I am in the middle of re-organizing my WHOLE space, so everything is in boxes right now. I am hoping to get it all sorted and done before friday night, it has to be done by sunday for the party.
This is a card we made at last months stamp club. I love wheels in general, but I am really loving this jumbo wheel. I also love the cottage wall DSP, I normally do not like one of the colors in in, but in this combination I really do like it.


Stamps: I {love} love jumbo wheel
Inks: Orchid Opulence
Paper: Very Vanilla, Rich Razzleberry, Pale Plum, Old Olive
Misc: Very Vanilla Jumbo Brads, Scallop Trim Border Punch
I am off to bed now, morning will come far too early. I am crossing my fingers that my internet will still be working when I wake up. I love hearing what you think of my creations, so leave me some love.
Until next time, Happy Scrappin'
Subscribe to:
Posts (Atom)