Showing posts with label Sponge Daubers. Show all posts

Sunday, April 24, 2011

Happy Easter

I wanted to take a quick minute to post an Easter card. This is a re-post of last years Easter's card. Some of the colors are now retired, and I got the idea from Jackie Topa. I hope you all are having a fantastic Easter


Stamps: Medallion
Ink: Pale Plum & Perfect Plum Classic Ink, Whisper White Craft Ink
Paper: Whisper White, Pale Plum, Perfect Plum
Misc: White Embossing Powder, Clear Embossing Powder, Modern Label Punch, 3/4" Circle Punch, Clear Rhinestone Brads, Dimensionals, Sponge Daubers


Wednesday, April 20, 2011

where does time go???

I really don't know. I have the best intentions of posting every second day, and then life gets in the way. I think we are well past the 3 bad things that come together, heck we might even be past 3 sets of 3 at this point. All I know is I am sick of bad things happening, and more than ready for some good.

This is a card from one of my club months. I'm thinking February, but I really don't know anymore.... that's how far behind I am. I love using the Medallion stamp, it just makes the most beautiful cards. I got the idea for this card off the internet somewhere, but now I have no clue where.... I wrote it down on a piece of paper and have since lost it. I changed several parts to it, but it is essentially the same card. There are so many ways to change up the look of the Medallion stamp, and using sponge daubers to create it in 2 tone is one of the best ways. I didn't want the card to look too flat so I sprayed the chocolate chip layer with water and crumpled it before putting it on the card base. It just adds a bit more interest to the card.

It's hard to see here, you really need to see it in real life, but I used shimmer paint and mixed it with rubbing alcohol and created a shimmer spray with the champagne shimmer paint. This card is sooo sparkly in real life. I also used a chocolate chip marker and the color spritzer to create the darker sprinkles on the card.

Stamps: Medallion
Inks: Bravo Burgundy, Rose Red, Chocolate Chip Marker
Papers: Blushing Bride DSP, Chocolate Chip, Rose Red
Misc: Linen Thread, Brights Buttons, Pearls, Small Heart Punch, Heart To Heart Punch, Color Spritzer, Shimmer Paint, Antique Brads, Sponge Daubers, Dimensionals


Tuesday, November 30, 2010

Magic Snowflake....

Only sort of.... It's not really magic, but it is cool. I love emboss resist, and it looks amazing on this card. The snowflake is done in white embossing powder and then sponged over with Night of Navy. I added a pearl to the middle for that little bit more, and it really makes the center pop. I love how much contrast there is on this card, I had originally done it in Marina Mist, but it looks a million times better in Night of Navy.


Stamps: Four The Holidays, Serene Snowflakes
Inks: Versa Mark, Night of Navy
Papers: Whisper White, Night of Navy
Misc: White Embossing Powder, Sponge Daubers, Silver Elastic Cord (retired), Pearls, Dimensionals

I had another long day today, but sadly I don't think it's over just yet. I realized I still have a ton of Christmas Cards to make, and I need to do them asap if I want to get them out before we leave. Days like today I am beyond grateful for wonderful caring nurses. My grams has been pretty out of it all day and her nurses are amazing! They have gone above and beyond what their actual duties are and I am sooo grateful for them.


Wednesday, November 24, 2010

Shimmer snowflake

My mom reminded me of a card I made last year, and I went looking for it and could not find it on my blog, so I made a new one up using this years colors, and tweaked it a little bit. I absolutely love the Shimmer Paint from Stampin' Up! You can use it for so many things, but the easiest way to use it is to simply put it on your stamps and stamp with it. That is what I did here. I used Markers to ink up most of the stamp and then used a sponge dauber to put the Platinum Shimmer Paint where I did not color. This card is so shimmery and pretty in real life, it looks nice in the photographs, but no where near as awesome. If you are ever trying to figure out what could make your card stand out just a little more, use some shimmer paint on it.


Stamps: Serene Snowflakes, Four The Holidays
Inks: Pacific Point
Papers: Whisper White, Pacific Point, Night of Navy
Misc: Platinum Shimmer Paint, Sponge Daubers, Filigree Brads, Rhinestones, Rhinestone Brads, Silver Elastic Cord (retired) Dimensionals


Thursday, August 12, 2010

it's the last one for a while....

... I swear!! If you are sick of brayer cards, this is the last one for a while. I have a few other cards to show you soon, but I wanted to make sure they would have arrived before I posted them on here. This is the last from my last brayer basics class. It is just a very simple card, but I love it for masculine birthday cards.


Stamps: Inspired by Nature
Inks: So Saffron, More Mustard, Pumpkin Pie, Chocolate Chip, Basic Gray
Paper: Soft Suede, Whisper White, DSP (retired)
Misc: Horizontal Slot Punch, Stampin' Dimensionals, Brayer, Sponge Daubers

I am off to bed, I have to get up early to finish getting paper cut and ready for my classes this weekend. Then I have another meeting with the healthy homes people to do another home visit. I love this program, it really helps you to learn all the things you in your own home can do to help the environment and save money. The visit tomorrow is all about food and sustainable choices. I have learned a lot so far, and I really love all the new cleaning products that are 'green' and are also better cleaners.

If you are in the Calgary Area, I have one spot left for Monday night's class, it is from 6-9pm at my place, email me if you are interested.


Thursday, August 5, 2010

Remember the 80's??

I normally choose not to remember the 80's, but that is what this background technique reminds me of. I cased this from linda on SCS, but changed a little bit and added some extra details like the punched out stars. I also misted the DSP with some water and crumpled it a couple times, I wanted the paper to look quite distressed, and ripped. I then sponged the edges with basic gray ink. This is another card from my most recent Brayer Basics class. It is a lot of fun to make.


Stamps: Extreme Guitar, Starring You (retired)
Inks: Basic Gray, Sage Shadow (retired)
Paper: Basic Gray, Whisper White, Sage Shadow (retired) and Nouveau Chic DSP (retired)
Misc: Star Designer Brads (retired), Brayer, Star Punch (retired), Sponge Daubers, Stampin' Dimensionals,


Friday, July 30, 2010

Another scrapbook layout

I am finally getting back into the groove of scrapbooking, and I got another LO done.... or at least mostly done! I am still trying to figure out what else this needs.... Every time I look at it, I think it needs something, but I have no clue what to add.

If any of you want to pass along a suggestion, please feel free to leave me a comment, I'd love some help figuring out what would finish off these 2 pages.


Stamps: none
Inks: Early Espresso
Paper: Bashful Blue DSP, Early Espresso, Almost Amethyst (retired), Sahara Sand DSP (retired SAB)
Misc: Colored Buttons (retired) Full Heart Punch, Heart to Heart Punch, Linen Thread, Ric Rak (made using Design Studio and the Cricut), Sponge Daubers

I am off to bed, I have to get up early tomorrow to help hubby pack for a boys weekend away. Sadly I will still have the kid, or I could have had the whole weekend to scrap, that would be a dream come true.


Wednesday, June 30, 2010

Beautiful Hydrangea.... take 3

I finally got some time to get this last card posted. I am totally in love with this set. I have only been coloring it in the 2 colors for these 3 cards, but I have plans to do this up with so many more colors!! I really hope you all love it as much as I do, since you will be seeing it a lot over the next year.


Stamps: Because I Care
Inks: Marina Mist, Concord Crush, Wild Wasabi
Paper: Concord Crush, Wild Wasabi, Marina Mist, Watercolor Paper
Misc: Rhinestones (eggcellent eggs kit), Aqua Pen, Rhinestone Brads, Stampin' Dimensionals, Finial Press Textured Impressions Folder, Sponge Daubers,

I am totally exhausted from teaching classes this past weekend, so I am off to bed. I want to thank everyone who came to my classes. I will have the rest of the pics up under the classes tab soon along with instructions. I am also going to be adding a few other classes later this summer so keep an eye out. If anyone is interested in long distance classes, please let me know by email and I will let you know how that works.


Monday, June 28, 2010

Beautiful Hydrangea.... take 2

I was hoping to get to posting this card on Saturday, but I was super busy this weekend with classes. I always love teaching classes, but when I do them it is tiring. The best part is always when someone creates a card using a new technique that they figure they can not master and it turns out wonderfully.... the look on their face is totally worth it.

I also had a blast doggy sitting. We took the dogs out to the off leash area and let them run wild. Meika found a slough and went head first into it, and came out soaking wet. Gross!! Needless to say she ended up getting a bath when we got home.

Here is take 2 of the Hydrangea card. I think you all will get sick of me posting cards from this set. I have already made 2 more cards in totally different styles with it, and I plan on doing many many more. This one is different from the first by changing the card base to Concrod Crush, and using Marina Mist as the background. I also added another mat in Marina Mist to the stamped image, and added rhinestones as well as the En Francais in the background.


Stamps: Because I Care, En Francais
Inks: Marina Mist, Wild Wasabi, Concord Crush
Paper: Marina Mist, Concord Crush, Watercolor Paper
Misc: Aqua Pen, Rhinestone Brads, Sponge Daubers, Stampin' Dimensionals

I hope you like take 2 and I should have take 3 up in a day or two. I have my last classes tomorrow night, and then plans to take the kid to the local amusement park on Tuesday, so sometime in there I will try and get it done and up.


Friday, June 18, 2010

Again????

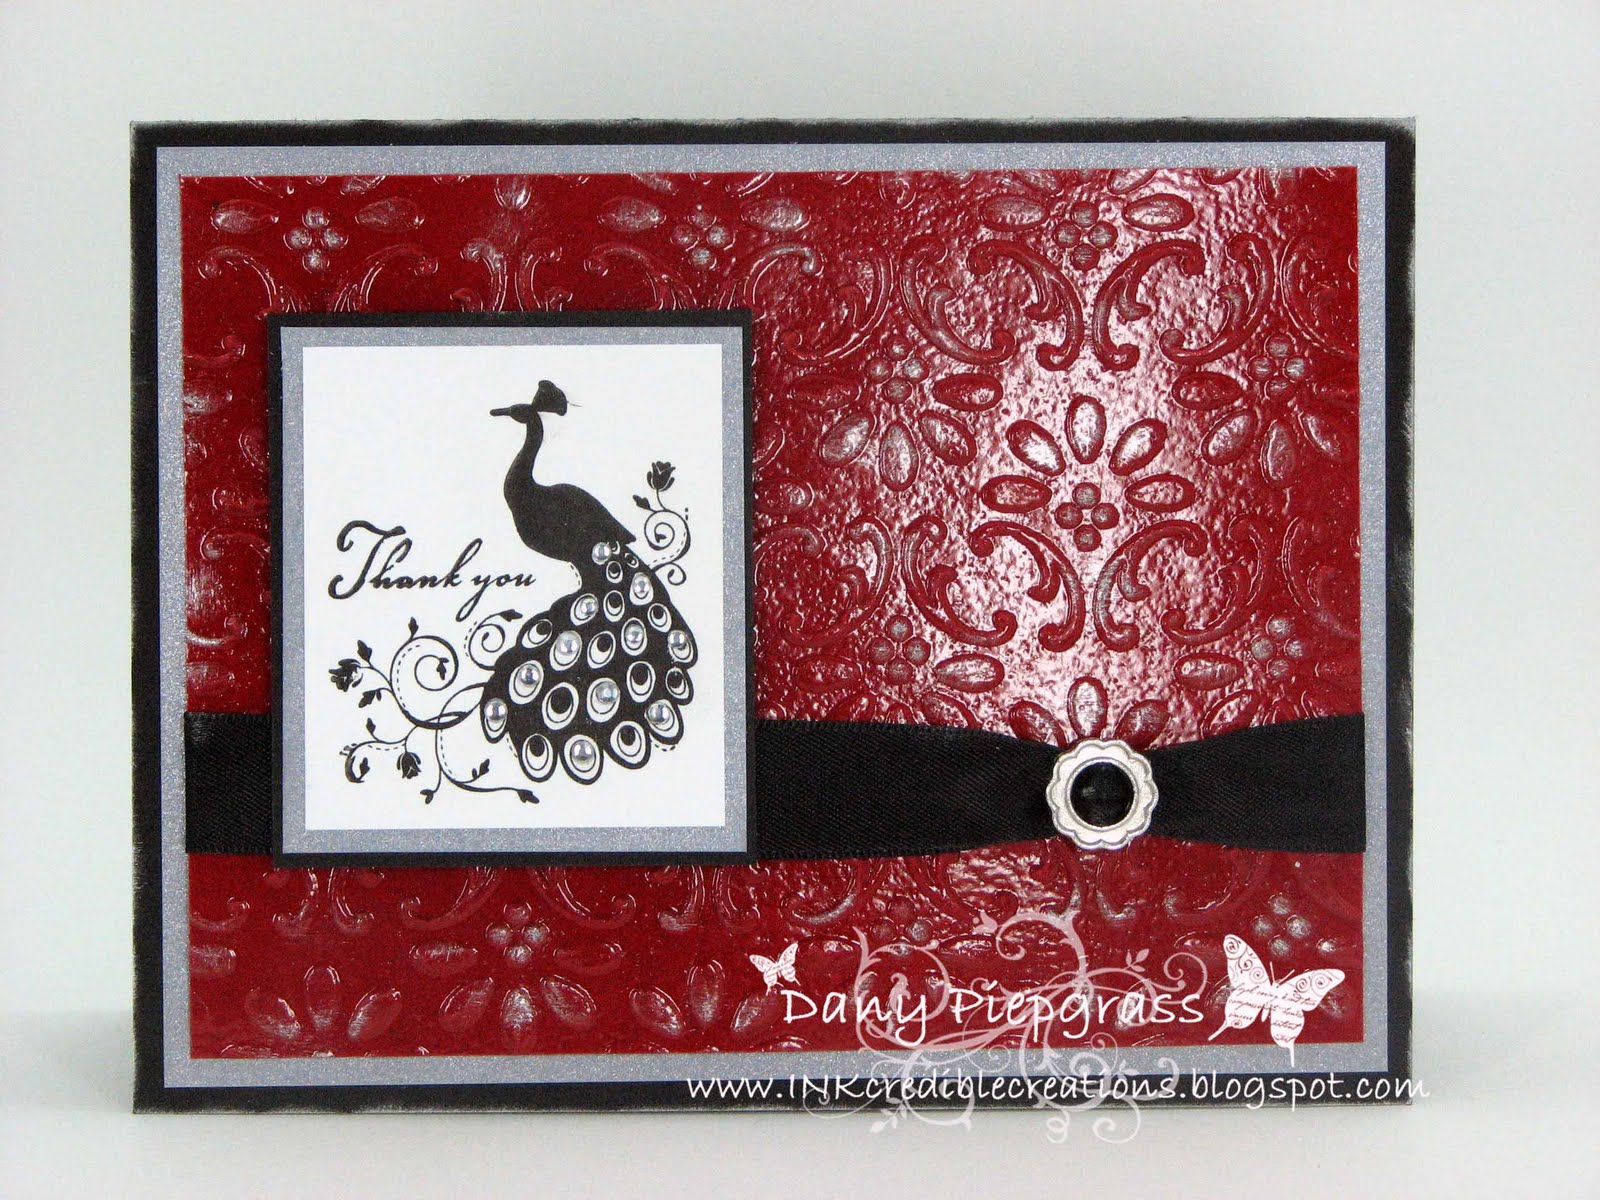
I know that is what you are all saying right now.... and I promise you that this is the last card made with this set for a while, probably a long while. I really am going to miss this set. I call this my triple embossed card. It is firstly heat embossed with clear embossing powder, then embossed using the big shot and the texturz folder finial press, and finally dry embossed over that with platinum shimmer paint.

I will warn you if you try this, that when you heat emboss first, then run it through the big shot, the embossing will crack and distress (which looks really cool). If you do not want the distressed look all you need to do is re-heat the powder. It will melt again and look all shinny and pretty like this card.


Stamps: Very Thankful
Inks: Basic Black, Versamark
Papers: Real Red, Whisper White, Basic Black, Brushed Silver
Misc: Platinum Shimmer Paint, Sponge Daubers, Rhinestones (from the Eggcellent Eggs Kit), 5/8" Basic Black Satin Ribbon, Ribbon Slide (Hodgepodge Hardware), Clear Embossing Powder, Final Press Texturz Folder

I think that is everything. It really is a very easy card to make, and looks stunning in person. I got my sneak peak order in, and will have a few really cool samples up in a day or two to tease you all with.


Saturday, May 29, 2010

This is totally fitting...

I have been busy all week getting ready for a massive community wide garage sale, and since we really had to clean up the garage and put all my hubby's tools away I think this card is quite fitting today. I bought Totally Tool with my hubby in mind since he loves to go wood working projects and has a ton of tools. I try to make him cards with this set often, and I love the message on this particular stamp....love beyond measure, it's quite cute, but is also how I feel, so it works out well.


Stamps: Totally Tool
Inks: Real Red, Pacific Point, Basic Gray,
Paper: Whisper White, Basic Gray, Pacific Point, Nouveau Chic
Misc: Star Designer Brads, Sponge Daubers, Stampin Dimensionals.

I wanted this card to have a bit more rugged and manly feel, so I crumpled some of the Nouveau Chic DSP and then added some dark gray with the sponge daubers.


Friday, April 9, 2010

Another PPA 37 challenge card

So I am not sure if I can enter more than 1 card into the Pals Paper Arts challenge, but I had so much fun making the last one, that I decided to do another. I had seen a card quite similar to this on the Stampin' Up! boards at Regionals or Conference or something and I loved it so I sketched it out and tried it today.

I also tried a few other things I have never done before. I took my Rich Razzleberry Marker and colored in the White 1/4" Grosgrain ribbon, and I took this picture while it was still wet, so it looks a lot darker than it is. I also took a sponge dauber to the edges of the flower to sort of simulate the rocker technique. And lastly, while I had done it before, I figured I should mention it anyways. For the little flowers I stamped the first one and then without re-inking it I stamped it again. for the 3rd flower I only slightly colored the stamp and then lightly pressed it to the paper, so I would have 3 levels of color. Then I sprayed the whole card with Platinum Shimmer Paint that I mixed up into a spray bottle, to make shimmer spray.


Stamps: For all you do
Ink: Basic Gray, More Mustard, Crushed Curry, Rich Razzleberry, Garden Green.
Paper: Rich Razzleberry, Crushed Curry, Very Vanilla, Basic Gray
Misc: Platinum Shimmer Paint, Word Window Punch, 1/4" Whisper White Grosgrain Ribbon, Sponge Daubers, Elegant Bouquet Textured Impressions Folder, Stampin Dimensionals

Crushed Curry is one of the colors on the farewell list, so if you like it, you might want to stock up on it.

Until next time, Happy Scrappin'

Saturday, March 13, 2010

Pixie Birthday

This is another card that was done with colors I am not used to using. The main pink is Pixie Pink and while it is really bright, it does look nice with other bright colors. This was done for a niece of mine who loves pink.


Stamps: Garden Greetings (retired)
Inks: Real Red, Only Orange, Tempting Turquoise, Pink Passion
Papers: Whisper White, Gable Green, Pixie Pink
Misc: Sponge Daubers, Texturz Plates backgrounds #1

I am off to watch another movie.... Today was my birthday party and a few of us are still here at my place partying the night away as best as we can (seeing as most of us are parents and will need to be up in the am). We are eating tasty dips and drinking awesome beverages.

Until next time, Happy Scrappin'

Thursday, February 18, 2010

Holiday Best

Sometimes Hostess sets don't look all that appealing at first, but then you want to make a card and they are the perfect set for that card. This is one of those times. I chose this set only for the Christmas stamp included in it, and did not think I would ever use the other stamps since I do not make thanksgiving cards and my Halloween cards are for kids, not adults and I like them to be funny or scary, not elegant. This Valentines stamp was perfect for a card I wanted to make for my husband.

I used the Nouveau Chic DSP and chalked a little bit more color onto it. This particular piece has a bit of Apricot Appeal on it, but I wanted to add some more Sage Shadow in without it being overpowering, so I used the Stampin' Pastels. They are perfect for adding just a little bot of color since you can really control how much goes on.


Stamps: Holiday Best
Ink: Basic Gray
Paper: Sage Shadow, Basic Gray, Whisper White Cardstocks, Nouveau Chic DSP
Misc: Sponge Daubers, 3/4" Circle Punch, 5/8" Basic Gray Satin Ribbon, Stampin' Pastels, Stampin' Dimensionals, Texturz Plates Backgrounds 1

I love the subtle added dimension that the Texturz Plates add to a project. It is not as crisp or defined as a typical embossing folder, but it still adds a little bit of interest. You can make it pop out more by adding a cardstock shim or two to get more pressure and get more definition.

Also if you are worried about your Satin ribbon fraying an easy way to seal the cut ends is to take your heat gun for embossing and to just hold it near ish the cut ends and it will melt the ends. You don't want to get too close, but you will see the change in the ribbon when you do this. I did it on this ribbon to show you what it looks like. You can barely notice that I did it, but they will not fray anymore.

To get the large scallop border I took 3/4" circles from the punch and cut them in half and placed them under the layer of sage shadow cardstock.

Until next time, Happy Scrappin'